Ultimate Rice Krispie Squares

skip to recipe
2CC210DB-A2A4-4773-8F6B-47196E8A0826.JPG

My mom used to always make Rice Krispie squares for my brother and I, and they were the BEST. I always wondered why my mom’s tasted so much better than any other Rice Krispie squares that other moms made, and I still don’t really know. She probably made them once a week, and in preparing this recipe, her and I reminisced, guessing how many batches of these she sent up to Antigonish (2 hours away from home) while my brother and I were in university. She used to always put semi-sweet chocolate chips in her squares, making them perfect with a big glass of milk.

Back in 2015 I bought Milk Bar by Christina Tosi, and quickly became obsessed with her ability to bring together nostalgia and perfectly seasoned sweets for that ideal sweet and salty bite. Inspired by Tosi’s “Compost Cookie (R)”, I started adding pretzels, potato chips sticks and corn flakes to my squares. The result is a more grown-up flavour but the same familiar taste of my mom’s Rice Krispie Squares. Enjoy!


Ultimate Rice Krispie Squares

15 minutes, 20 minutes to cool

Pro-tip: the first 3 ingredients you can buy at the Bulk Barn or your local bulk store, rather than buying full packages

Ingredients

1 cup salted pretzels sticks

1.5 cups potato chip sticks

2 cups corn flakes

5.5 cups Rice Krispies

½ cup butter, unsalted (if using salted, do not add kosher salt)

1 tsp kosher salt

~55 marshmallows (about one large bag)

1 tsp vanilla extract

¾ cup semi-sweet chocolate chips

1/3 cup Skor toffee bits


Method

  1. Prepare a 11 x 17 pan by greasing generously with butter.

  2. Mix together the first three ingredients (pretzels, potato sticks, corn flakes), crushing with your hands to make them smaller pieces (but not dust). Add in Rice Krispies and stir until uniformly mixed.

  3. In a large bowl, melt the butter in microwave*. Add in the kosher salt.

  4. Add in marshmallows and microwave in 30 second intervals until marshmallows have puffed up / are melty and can be stirred to incorporate into butter. Stir in vanilla extract and continue to stir until smooth. Be ready to move quickly to step 5 otherwise your marshmallow mixture will harden.

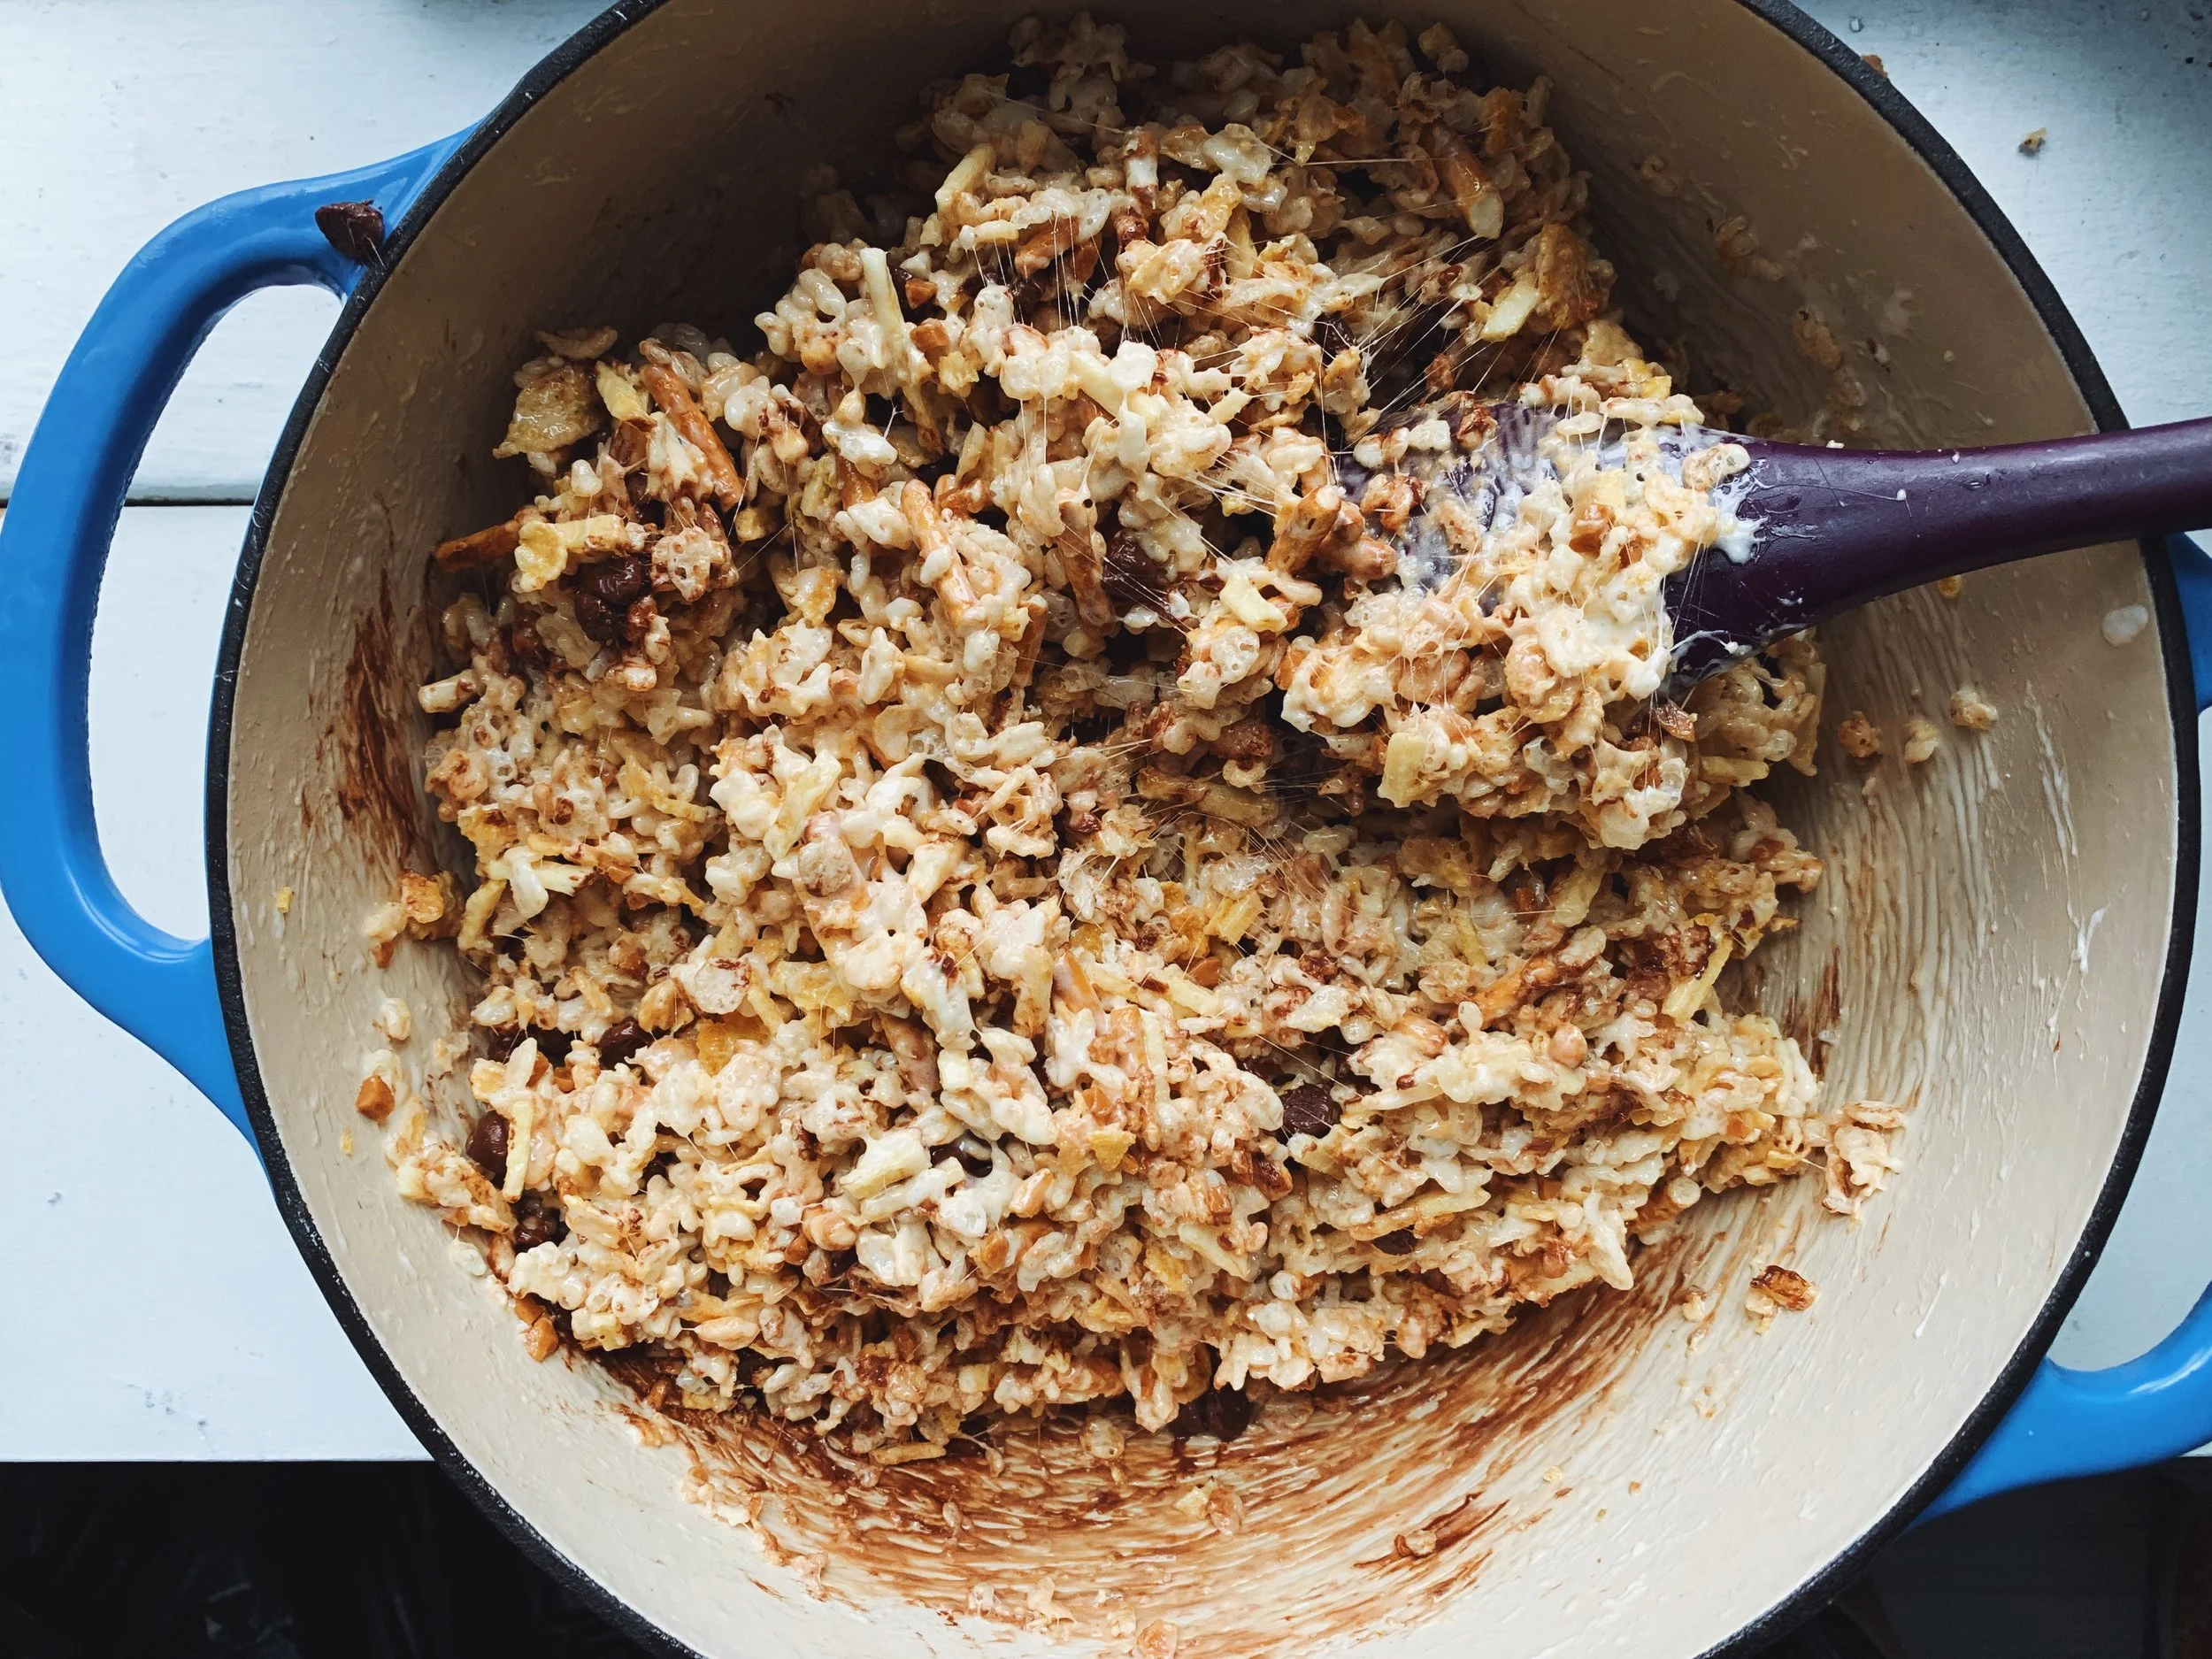
  5. Moving quickly, stir in dry ingredient mixture to the marshmallow sauce until fully coated. Add in the chocolate chips and skor bites last to prevent too much melting, folding until uniformly mixed.

  6. Press into the prepared pan (coat your hands with butter so the mixture does not stick to your hands, or use a piece of parchment paper to press down).

  7. Refrigerate until hardened. Store in fridge for up to 5 days.

*If you’re like me and somehow have reached adulthood without a microwave safe mixing bowl, you can also do this on the stove top. Start by melting the butter over medium heat, and then keep a very close eye when you add in the marshmallows. Stir often once the marshmallows are in to prevent sticking - remove from heat once it becomes smooth and uniform, before adding in the vanilla.

Pork Tenderloin with Grape Sauce

Skip to recipe
94677A3E-F441-4B8A-805C-E2E037F6D776.jpg

I have a major sweet tooth, and because of that I am a sucker for a savoury dish with a bit of sweetness. My mom first started making a dish similar to this after taking a cooking class in Charleston, South Carolina. We’ve played around with it over the years and it's now a staple of our family’s dinner repertoire. Grape jelly seems a little weird to put into a dinner dish, but the key to this sauce is adding in any pork juices and mustard that are left on the pan after the meat rests. The savouriness of the pan juices balance the cloying sweetness of the preserved jelly.

Spring is the perfect time to serve this dish, with seasonal asparagus roasted on the side.


2C8A9D6C-CE32-4EE0-AAE3-DE9DABB6B42B.jpg

Pork Tenderloin with Grape Sauce

45 mins

Ingredients:

Roast pork:

  • 2 pork tenderloins

  • 4 tbsp of grainy mustard  (my favourite is Maile Old Style Dijon Mustard)

  • Kosher salt and pepper


Grape sauce:

  • 1 tbsp olive oil

  • 1 onion, sliced

  • 2 cloves of garlic, minced

  • 1 cup of concord grape jelly (I use Welch’s)

  • ¼ cup of water

  • 2 tbsp of low-sodium soy sauce

Perfect roasted asparagus:

  • 1 bunch of asparagus

  • 1 tsp of olive oil

  • Kosher salt and pepper

  • ½ lemon


Pork method:

  1. Preheat oven to 400F

  2. Prepare your pork tenderloins: clean off any excess fat and remove the silver skin if not already cleaned (I run a paring knife against it to pull it off). Place onto a baking sheet lined with parchment paper.

  3. Generously season each tenderloin with kosher salt and pepper (I use about a ½ tsp per tenderloin).

  4. Rub 2 tbsp of grainy mustard onto each pork tenderloin.

  5. Roast in preheated oven for 20-25 minutes, until a meat thermometer reads 145F.

  6. Remove from oven and cover with tinfoil while it rests. This is a great time to pop in some asparagus in the oven (method below).

  7. When you remove the pork to slice, pour the juices and mustard that remain on the baking tray into the sauce you’ve prepared (method below).

Sauce method:

  1. Heat a medium sauce pan to medium heat with olive oil. Saute the onions until they become transparent (5-7 mins).

  2. Add in the minced garlic and continue to saute until fragrant. Add in the grape jelly, soy sauce and water, scraping the bottom of the saucepan to ensure everything is lifted.

  3. Reduce the heat to medium-low and allow to simmer while your pork is cooking.

  4. Before serving, add in the pork juices and mustard from the baking sheet to finish the sauce.


Asparagus method:

  1. Trim the ends of your asparagus to remove the tough parts. Place on a baking sheet lined with parchment paper.

  2. Drizzle with olive oil and salt and pepper.

  3. Turn the oven up to 425F once the pork is removed and bake the asparagus while the pork is resting (15 mins).

  4. Remove the asparagus from the oven and squeeze the juice of ½ a lemon over top.

Serve the pork, asparagus and sauce with mashed potatoes.


Lemon Pepper Orzo with Shrimp and Snap Peas

Skip to recipe
0C79628E-9AFB-402D-B183-04AA830F8B3B.jpg
1D899DEF-C268-4731-BCE0-FCA6EB627F61.JPG

My mom used to make a lemon pepper pasta growing up that was one of my favourite dishes. She added shrimp, snowpeas, and we always topped it with a generous serving of parmesean cheese (or as I used to call it “sprinkle cheese”). People often say that fish and cheese don’t go together, but many east coast dishes combine the two - I think lemon always being present cuts through the richness which is what makes it work.


Spring is a wonderful time for this pasta as there are many vegetables coming into season. Sugar snap peas are my favourite but snow peas would also work. I’ve also done this with roasted asparagus instead of peas - in that case just skip step 5 and go straight to cooking the shrimp. Add your roasted asparagus in when you add the orzo to the pan. Sugar snap peas, snow peas and asparagus are all about to hit their peak season so now’s the time to embrace this light, fresh pasta dish.


B1667445-AE4C-43AE-9279-273F783B9EA7.JPG
9D43E06A-2F90-49ED-A849-D598A2DD0EA7.JPG

Lemon Pepper Orzo with Shrimp and Snap Peas

30 mins total

Ingredients:

340g package frozen, raw shrimp

1.5 cups orzo pasta

1 shallot, finely diced

2 cloves of garlic, minced

227 g package of sugar snap peas (yields about 2 cups)*, cut into thirds

1.5 tsp of freshly ground black pepper

2 tbsp of water

2 tbsp of lemon juice

1 tbsp of unsalted butter

1 tbsp of olive oil


Parmesan-reggiano to serve


Method:

  1. Place your frozen shrimp in a bowl and cover with cool water to thaw.

  2. Bring a medium pot of water to a boil for your orzo.

  3. Meanwhile, in a frying pan, add olive oil and bring to medium- high heat.

  4. Sauté shallot and garlic in the pan until shallot is translucent and garlic is aromatic (2-3 mins). Add in black pepper and allow the pepper to sizzle in the oil with the shallot and garlic for 1 min.

  5. Reduce the heat to medium and add in your snap peas. Pour in 2 tbsp of water to the pan to deglaze the bits that have begun to stick and add some moisture to help steam the peas. Season the peas with salt and pepper.

  6. Add a handful of kosher salt to your boiling water and then add in the orzo. Cook according to package - usually 6-7 mins for al dente.

  7. Peel your shrimp and add to your pan. I like to push my veggies to the side and add the shrimp in an even layer directly onto the pan. Try not to disturb them until you see the pink peaking through to the other side (usually 1-2 mins) and flip them to the other side.

  8. Drain your orzo (DO NOT RINSE) and add to the pan with the shrimp and vegetables - it’s ok if some pasta water comes with it! That will help the flavours stick.

  9. Add butter and lemon juice and give everything a good stir. Taste - season and adjust if needed.

  10. Serve with Parmesan cheese on top and some freshly cracked pepper.


Butternut Squash Pasta Roses

skip to recipe
CF67A683-1975-435E-9531-4338664A9578.jpg
FA2F6B71-3012-4588-BA87-56215E941817.JPG

This pasta is one of my favourites to make for company. Its fun shape has a wow factor when serving, and the fact that everything can be prepped ahead before popping it in the oven makes the clean up easy. It’s also packed full of veggies, but I don’t think anyone will miss the meat. Butternut squash is one of my favourite vegetables and its natural sweetness and pop of colour adds to the fun. Broiling for a few mins at the end will achieve the crispy edges effect from lasagna, adding texture to every bite. A few simple ingredients come together for a lot of comforting flavour.


Butternut Squash Pasta Roses

1.5 hours total


Ingredients:

1 small butternut squash roasted, prepared below (can be done a day ahead of time)

3 cups fresh spinach (I often use a whole container 5 oz)

1 container of ricotta (475g)

1 package of “fresh” lasagna sheets

1 bottle of tomato sauce (or make your own, below)

Kosher salt

Pepper

Optional: Parmesan cheese


Optional homemade sauce:

1 bottle of passata (or canned crushed tomatoes if you can’t find passata)

2 tbsp of olive oil

3-4 garlic cloves, minced

Optional: dried herbs (oregeno, basil or italian seasoning), red pepper flakes

Method:

Butternut squash prep: (while your squash is roasting you can prep your sauce and filling)

Preheat oven to 400F

  1. Cut the butternut squash in half and scoop out the seeds/stringy flesh

  2. Place the butternut squash face down on a parchment sheet lined cookie sheet and roast for 30-40 mins, until the outside skin looks dark and the squash has slightly collapsed. You want the flesh to be fork tender.

  3. Scoop the butternut squash flesh into a bowl and season with salt and pepper. You want the squash to be well seasoned - it should taste good on it’s own. Set bowl aside.

Sauce prep (optional):

  1. Add 2 tbsp of olive oil into a sauce pan (or skillet) and heat to medium heat

  2. Add in 3-4 cloves of garlic, minced, and sautee until fragrant (30 seconds to 1 min)

  3. If you are adding in dried herbs, add them now (I usually do about 2 tsp of oregeno)

  4. Pour in 1 bottle of passata and let it simmer on low for 15-20 mins, or until you’re ready to assemble the pasta. Cover if you’re going to simmer for longer than 20 mins, otherwise you’ll lose too much liquid.

  5. Season with salt and pepper, feel free to add a pinch of red pepper flakes too if you like some spice

Cheese filling prep:

  1. Add the ricotta into a bowl

  2. Thinly slice spinach into small strands and add to bowl

  3. Stir, seasoning with salt and pepper - add 2 tbsp of grated Parmesan if you’re feeling cheesy. Set aside.

The pasta prep:

  1. Bring a pot of well salted water to a boil (1-2 tbsp of salt - don’t be afraid of salt, you want your water to be well seasoned so that your pasta is seasoned)

  2. Drop in one lasagna sheet and simmer until it floats, about 1 minute

  3. Transfer the lasagna sheet to a bowl and drizzle a little olive oil to prevent it sticking to the next

  4. Continue until all the pasta sheets are cooked

The assembly:

Preheat oven to 375F

  1. Scoop about ½ cup of your pasta sauce and spread at the bottom of a 13 x 9 glass baking dish

  2. On a cutting board, place one pasta sheet down

  3. Spread one spoonful of ricotta filling onto the pasta sheet (about 1/4 cup)

  4. Spread a spoonful of butternut squash filling on top (about 2 tbsp) - it will mix a little bit but try to layer as best as possible

  5. Roll the pasta sheet from the short side (should be a short cylinder, not a long cylinder)

  6. Slice into thirds. Place each piece vertically in the baking dish so they look like roses

  7. Continue the above for each pasta sheet, filling the pasta sheet (you might have some spaces between the “roses” but that’s ok!)

  8. Fill the spaces between the pasta with remaining pasta sauce

  9. Top with grated parmesan if your heart desires

  10. Cover with tinfoil, and place in the oven, bake in your preheated oven for 30 mins

  11. After 30 mins, remove the tin foil and broil on high for 2-3 mins to get some crispy edges on the pasta tops

  12. Serve by itself, with garlic bread, or with a simple arugula salad (lemon juice, olive oil, salt and pepper)

Leek, Mushroom, and Camembert Quiche

Skip to recipe
IMG-9086+%281%29.jpg

In 2011, I spent part of the summer studying in Lyon, France. As a student, I tried to save money on most meals so I could splurge on a few dinners out in the city known for its food scene. This frugalness involved many Subway sandwiches early on in my stay. I was quite proud to learn the local nuances of ordering a 6-inch sub en français (lettuce is “salade”, rather than “laitue” as displayed on the menu). But soon enough, my friend and I discovered a small café just down the road from our residence with the same price point as Subway but a bit more French culture. The café had a lunch deal where you could get a slice of quiche, a side salad and a dessert of your choice for just 3 Euro! It was at that café where I fell in love with leek, camembert and honey combo in quiche form. This recipe is my version of the quiche that was a regular mainstay of my time in Lyon.

This is not a time to use your grocery store honey – stop by a farmer’s market and pick up local product to really taste the flavour potential of honey. Or if you have any vacations coming up, I encourage you to take a look for honey on your travels. I love picking up honey as my memento of a trip – honey from different regions of the world have different flavours dependant on the local flowers. I served mine with honey I picked up on a recent trip to Portugal.

A simple arugula salad with lemon juice, olive oil and salt n peppa makes the perfect side

A simple arugula salad with lemon juice, olive oil and salt n peppa makes the perfect side


Leek, Mushroom, and Camembert Quiche with local honey

Ingredients:

  • 1 leek, sliced

  • 1 pint of mushrooms, sliced

  • 1 tbsp olive oil

  • 1 tbsp unsalted butter

  • Kosher salt and pepper to season

  • ¼ tsp red pepper flakes

  • 6 large eggs

  • ¾ cup 5% cream (or whatever level M.F. you desire – the higher the milk fat the creamier it will be)

  • Camembert cheese, sliced into .5 cm slices (keep the cheese in the fridge until right before you slice it – will make it easier to slice thinly)

  • Serve with honey


Method

  1. Preheat oven to 375F. Prepare a 9” pie plate with your pie crust. Place the prepared pie plate onto a cookie sheet (this catches any overflow and makes it easier to carry the pie plate flat).*

  2. Melt the butter in a medium pan over medium heat and add the olive oil. Add in the sliced leeks and sautee until soft and translucent (5-7 mins)

    • In the same way that you soften onions, the goal here is to not get any colour (brown/black) on the leeks. They should be soft and tender. The best way to tell your leeks are cooked is when they don’t hold their half circle shape as strongly any more, there’s a bit of wiggle to their shape.

  3. Add in chopped mushrooms to the pan and don’t stir. Let the mushrooms cook in the pan on one side for 3-5 mins. This will allow them to brown nicely.

  4. Season to taste with salt and pepper.

  5. Add red chilli flakes to the leeks and mushrooms and stir. Continue to cook until the mushrooms are cooked through (another 3-5 minutes). Remove from heat.

  6. In a medium bowl whisk together eggs and cream and season with salt and pepper

    • Try to not get too much air into the eggs while you whisk them by keeping the whisk low in the bowl. This will ensure a custard-y texture for the quiche filling.

    • Only season your eggs right before pouring into the crust – if you season them too early they will turn grey

  7. Distribute the leek and mushroom mixture evenly on top of the crust. Pour the egg mixture in next – it should reach just to the top of the crust.

  8. Gently place slices of camembert on top of egg mixture – they will sink a little bit but should generally float.

  9. Place in the preheated  oven and bake for 25 mins.

  10. Check the quiche after 25 mins and give the cookie sheet a gentle shake. If the centre still jiggles, continue to bake and check for jiggle every 5 minute increment. I like mine browned on top, so the extra 10 mins does the trick.

  11. Let it sit for 10 mins to cool and set. Slice and top with drizzles of honey. Enjoy with a light arugula salad (arugula, lemon juice, olive oil, salt and pepper).

*if you want to blind bake your pie crust this is when you would do it. Blind baking involves putting the pie crust into the preheated oven with a piece of parchment paper and pie weights or dried beans on top to allow the crust to pre-bake for 10 minutes before putting in the quiche filling. This ensures your crust is cooked through. Honestly, I only do this about 10% of the time when I feel really ambitious. Since the oven is quite hot for this quiche the crust will bake through well without a blind bake, but it certainly won’t hurt to do this if you’d like.